One of the reasons I decided to create this blog was that I was stuck with an issue while integrating Redis into my TypeScript application. I went online and did some research but I couldn’t find a solution. After critical analysis and trying out some methods, I was able to fix the issue. That’s why I am sharing this article hopefully, someone or persons will find it helpful and they don’t have to spend as much time as I did before discovering a solution.
Before we delve into the technical part of this article, a brief summary of Redis and the tools we will be using in this tutorial.
What is Redis?
Redis is an open-source, in-memory, disk data storage where values are stored in key-value format. It is a data structure store because it supports data structures such as strings, lists, hashes, sets and sorted sets. Redis has a wide range of commands one can use to manage data on the Redis server. We are using the Redis Stack Server to set up the Redis server on our machine. The Redis Stack Server comprises Redis OSS and Redis Stack. This stack enables you to have a full developer experience while building your application. Don’t stress yourself if you don’t grasp the Redis Stack Server concept yet. Later on in this tutorial, you will get to see the implementations and it will make sense. You can read up on the Redis Stack Server here
Goal
The essence of this tutorial is to learn how to integrate and manage data using Redis and TypeScript to implement the logic. This tutorial is meant to expose us to a full developer experience using Redis.
What is TypeScript
TypeScript is an open-source strongly typed programming language that is embedded in JavaScript. Before using TypeScript you have to be familiar with JavaScript because it is a super-set of JavaScript.
Prerequisite
- Node Engine
- Yarn or NPM installer
- MySQL server
- IDE (E.g: Visual Studio Code)
- Knowledge of JavaScript
- Familiar with TypeScript
We are developing a simple fictitious Book Library API application where users can read e-books.
Redis Set Up
To install Redis on your local machine use this link Redis Setup. If you are using a Linux base OS (Ubuntu) like me then follow the instructions below.
Install the lsb_release module:
# if this package is installed already on your machine please skip this step
> sudo apt install lsb-release
Add the repository to the Apt index:
> curl -fsSL https://packages.redis.io/gpg | sudo gpg --dearmor -o /usr/share/keyrings/redis-archive-keyring.gpg
> echo "deb [signed-by=/usr/share/keyrings/redis-archive-keyring.gpg] https://packages.redis.io/deb $(lsb_release -cs) main" | sudo tee /etc/apt/sources.list.d/redis.list
Update your system dependency packages:
sudo apt-get update
Install Redis with this command:
> sudo apt install redis-stack-server
To enable Redis to start using the Ubuntu systemd init system, use the command below to open your redis.conf file:
> sudo nano /etc/redis/redis.conf
The supervised directive is no by default. Change the no to systemd.
Inside the file, search for the supervised directive and change it to systemd:
...
supervised systemd
...
Save the file and exit.
Restart the Redis service to update your changes:
sudo systemctl restart redis.service
To test that Redis has been installed and is functioning correctly run the command on your terminal:
> redis-cli
Output:
127.0.0.1:6379>
Test connectivity:
127.0.0.1:6397>ping
Output:
PONG
That’s it. Your Redis server is properly set up for use.
Docker Set Up
Docker should be installed and functioning before installing the Redis Docker container. Use this link Docker Installation to set up Docker on your machine. Before installing the Redis Stack we need to understand that Redis has two Docker containers which are redis/redis-stack and redis/redis-stack-server. The redis/redis-stack container is suitable for development, it contains the Redis Stack Server and RedisInsight (RedisInsight is a Redis GUI visualization tool for visualizing and optimizing data in Redis) while redis/redis-stack-server container is for best production.
This is personal, I prefer using the redis/redis-stack-server container to set up my Redis server.
To download the Redis server container:
> docker run -d --name redis-stack-server -p 6379:6379 redis/redis-stack-server:latest
Use the command below to ensure your Docker container is up and running. It will display all running containers:
> docker ps
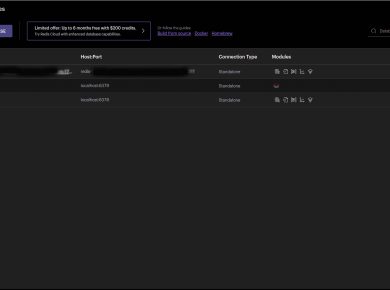
f your Redis server container is running then you should have something similiar:
Your container name and port number should be different from mine. I have another Redis container running.
Let’s get into our Redis container shell:
> docker exec -t redis-stack-srv sh
Run the Redis CLI:
redis-cli
You will see the Redis prompt on your terminal or cmd.
Output:
127.0.0.1:6377>
Yours should look like this: 127.0.0.1:6379>
Now we have our Redis server running on our machine.
Project Set Up
As I mentioned earlier we are developing a Book library API and we are using Express framework and TypeScript. Let’s create our project directory. Open your terminal and type the command below:
Before typing the command, ensure you are in the directory where you want your project directory or folder to reside.
mkdir ebook-redis-express-typescript
Cd (change directory) into your application folder. Enter the following commands on your terminal:
yarn init -y
Setup TypeScript on your application.
I prefer installing TypeScript as a dev dependency on my projects. If you have TypeScript installed globally on your machine, skip the next step.
yarn add -D typescript
The tsconfig.json file is a TypeScript compiler file and it specifies compile options. Let’s generate the tsconfig.json file:
npx tsc --init
In your tsconfig.json file, remove the comment, and update the following:
"target": "ES2019",
"module": "CommonJS",
"moduleResolution": "node",
"outDir": "./dist"
Time to install development packages.
yarn add -D express redis-om nodemon
Express: A backend framework embedded on JavaScript for building RESTful applications.
Nodemon: Monitors your scripts for changes (recommended during development. Not to be used for production).
Redis: A Redis client for interacting with the Redis server.
Redis OM: A Redis client for interacting with Redis server and also creating data models.
# typescript definition packages
yarn add -D ts-node @types/node @types/express
Let’s create our entry point script. Create a folder src on the root folder of your application. Inside the src folder create an app.ts file.
mkdir src
# CD into the src folder
cd src
# inside source folder create an appt.ts script
touch app.ts
Inside your app.ts script :
import express from 'express';
const app = express()
app.use(express.json());
const PORT = process.env.PORT || 3000
app.listen(PORT, async () => {
console.log(`app is running on port ${PORT}`)
})
Let’s set up the Redis connection. On the root folder of your application create .env
The .env file will contain the Redis server environment variables.
Open your .env file:
REDIS_URL=redis://localhost:6379
We need to install a dotenv package that will enable our application to interact with our environment variables. Go to your terminal:
yarn add dotenv
Redis Connection
The Redis client enables our application interacts with the Redis server.
After the dotenv package installation, inside the src folder, create a connection.ts script. The connection.ts file will hold the Redis connection setup:
import 'dotenv/config'
import { Client } from 'redis-om'
export default async function() {
const url = process.env.REDIS_URL
const client = new Client()
const redisConn = await client.open(url)
// to check for connection. you can delete it after we have confirmed our connection is successful
const dbCheck = await client.execute(['PING']);
console.log(dbCheck)
return redisConn
}
Go to your app.ts and import the Redis connection:
import express from 'express';
// Redis connection import
import RedisClient from './connection';
const app = express()
app.use(express.json());
const PORT = process.env.PORT || 3000
app.listen(PORT, async () => {
await RedisClient();
console.log(`app is running on port ${PORT}`)
})
Go to your package.json script and add the following:
...
  "scripts": {
    "dev": "nodemon ./src/app.ts"
  },
...
Your script should look like this:
{
  "name": "ebook-redis-express-typescript",
  "version": "1.0.0",
  "main": "index.js",
  "license": "MIT",
  "scripts": {
    "dev": "nodemon ./src/app.ts"
  },
  "dependencies": {
    "dotenv": "^16.0.3",
    "express": "^4.18.2",
    "nodemon": "^2.0.20",
    "redis": "^4.5.0",
    "redis-om": "^0.3.6"
  },
  "devDependencies": {
    "@types/express": "^4.17.14",
    "@types/node": "^18.11.9",
    "ts-node": "^10.9.1",
    "typescript": "^4.9.3"
  }
}
Go to your terminal and run:
yarn dev
If your terminal is looking like the image above that means your application is up and running as is supposed to, if you are experiencing any errors please go through the instructions again.
The next phase is to set up the Book entity and this is where our Redis OM (Object Mapper) comes in handy.
Redis OM enables us to use the RedisJSON to create JavaScript objects. RedisJSON is one of the Redis modules one can use to create and retrieve data in JSON format from the Redis database.
Inside the srcfolder create a repositories folder that will hold the entity classes. Create a BookRepo.ts script inside the entities folder:
Your file path should look like this: src/repositories/BookRepo.ts . The Repository will provide us with the ability to carry out the CRUD (Create, Read, Update and Delete) functionalities on our application.
import { Entity, Schema } from 'redis-om';
import redisClient from '../connection'
class Book extends Entity {}
const BookSchema: any = new Schema(Book, {
title: { type: 'string' },
author: { type: 'string' },
pages: { type: 'number' },
publisher: { type: 'string' },
category: { type: 'string' },
publishedDate: { type: 'date' },
},{
dataStructure: 'JSON'
});
const setup = async () => {
const bookRepo = (await redisClient()).fetchRepository(BookSchema)
await bookRepo.createIndex()
return bookRepo;
}
export default setup
Next step is to set up the controller that will act as a middle man between Repository and the Routes. Create a controllers folder inside the src folder. Create a BookController.ts inside the controllers folder. In the script we will import the BookRepo file:
File path: src/controllers/BookController.ts
import { Request, Response, NextFunction } from 'express'
import BookRepo from '../repositories/BookRepo';
export default class BookController {
public static createBook = async (req: Request, res: Response, next: NextFunction) => {
try {
const result = await (await BookRepo()).createAndSave(req.body)
return res.send({
status: 'success',
data: result
})
} catch (error) {
next(error)
}
}
}
Let’s set up the routes file. Inside the src folder create a routes.ts file:
File path: src/routes.ts
import express, { Router } from 'express';
import BookController from './controllers/BookController';
const router = express.Router();
router.post('/book', BookController.createBook)
export default router
Go to your app.ts and import your route file:
import express from 'express';
import RedisClient from './connection';
import router from './routes';
const app = express()
app.use(express.json());
const PORT = process.env.PORT || 3000
app.use('/api/v1', router);
app.listen(PORT, async () => {
await RedisClient();
console.log(`app is running on port ${PORT}`)
})
open your Postman or any HTTP client you are familiar with setup the book object and hit this endpoint:
localhost:3000/api/v1/book
Let’s fetch go ahead and fetch the book that was just created. Let’s create the endpoint. Go to your BookController.ts and add the following method inside the BookController class:
public static getBookById = async (req: Request, res: Response, next: NextFunction) => {
try {
const result = await (await BookRepo()).fetch(req.params.id)
return res.send({
status: 'success',
data: result
})
} catch (error) {
next(error)
}
}
Go to your routes.ts and add the following endpoint:
router.get('/book/:id', BookController.getBookById)
On your Postman, hit the endpoint: localhost:3000/api/v1/book/
Bravo!
We are able to fetch our book by the Id.
Setting up a Redis server on your local machine is only suitable for development because data are being stored on the local memory. Imagine having a large data set, and developing an application that will be used by a large number of people. You cannot use your local machine as storage for such projects.
Here is the catch! Redis has grown into a full-blown NoSQL database and has provided us with the Redis Enterprise Cloud for production-ready applications. In Part 2 of this tutorial, we will learn how to integrate the Redis Enterprise Cloud into our application.
REDIS Cloud Developers’ Experience With TypeScript – Part 2
Meet me in the comment section for questions and feedback.
This post is in collaboration with Redis

Related
Redis Developer Hub – tools, guides, and tutorials about Redis
Watch this video on the benefits of Redis Cloud over other Redis providers
Also Related: