Using Redis database just for cache is like using a modern mobile phone just for phone calls! You are missing out on a ton of cool things it can do! Give it a try! – Raja Rao, (VP of Growth Marketing at Redis).
I couldn’t agree more with Raja. There is a whole lot one can do with Redis, why limit yourself? Since I started using the Redis database to manage my data, first it improved my application speed, and I have learned a lot about Redis Stacks and Redis Cloud. In this tutorial, I will share my experience with you. We will go over how to create records in JSON format using the RedisJSON, index, and search records using the RediSearch stacks. You can read my other blog How To Store And Retrieve RedisJSON on Redis Cloud using Node.js where I threw some light on the gains of using Redis and Redis Cloud.
Redis OM
Redis OM is the magic stick developers can use to create data models on our applications and map them to the Redis database. Just like Mongoose, with Redis OM we can create models that interact with the database. This tool makes us (Software Developers), get a better experience while using Redis on our application.
Goal
The aim of this tutorial is to learn how to use the Redis technologies to store our data on the Redis cloud while utilizing its high throughput and low latency. We will be creating a Digital Book Library API using NodeJs. The library database will contain a book entity.
Prerequisite
- Node Engine
- Yarn or NPM installer
- IDE (E.g: Visual Studio Code)
Setup Redis Cloud Account
You can use this link Redis Cloud to create a free account. After registration click on the New subscription button to set up a plan. If you’re new to Redis you can start with a free subscription to get yourself familiarised with the platform or you can pick a paid plan. For this tutorial, I am using the AWS vendor but you can choose another vendor you’re more comfortable with. After creating a subscription you can go ahead and create a database. When creating a database, there is a type with three options for you to select from. For this tutorial, we will be using the Redis Stack Modules.
Redis Stack gives you a software development experience by enabling you to create data models and map them to your database. With RedisJSON module you can create records in JSON format and use the RediSearch to query them.
Let’s go create our API!
Project Setup
Create a project folder redis-book-libray (you can name your project differently) and CD into the project folder.
$ mkdir redis-book-libray$ cd redis-book-libray$ yarn init -y (You can use NPM)
$ yarn add express redis-om nodemon
In your project root folder, create a src folder that will hold most of your program logic. I like to separate concerns for code clarity, easy debugging, and reusability. Let’s set up our database connection. Create a connection.js file inside your src folder. On the client.open() method paste your database credentials there. You can get your database details from the configuration tab after logging
import { createClient } from 'redis';
import { Client } from 'redis-om';

// Database connection
const client = new Client()
// E.g URL = 'redis://default:WyfL..WH...AtUS3...jW...nf@redis-1...1.c73.us-...t-1-2.ec2.c..d.redislabs.com:1...1'
const DBConnection = await client.open('redis://username:password@Public-endpoint:port');

export default DBConnection;
Database Credentials
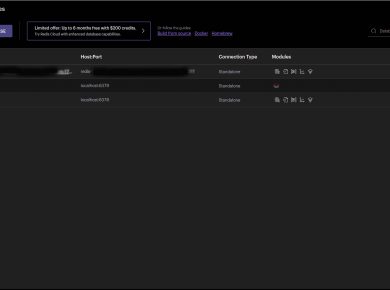
After registration, on your side bar click on Databases go to your Configuration tab, under General you will see your public endpoint which is your host; and the digits after the colon, is your port number, scroll down to security you will see your username and password. If you are using the free subscription your username is default.
Inside your src folder, create an app.js file that will serve as the gateway to your application. Ignore the imported route function for now. That will be sorted out later.
import express from 'express';
import routes from './routes.js';

const app = express()


app.use(express.json());


const PORT = process.env.PORT || 3000

app.use('/api/v1', routes);

app.listen(PORT, async () => {
    console.log(`app is running on port ${PORT}`)
})
Go to your package.json file and set up your scripts.
{
  "name": "redis-book-libray",
  "version": "1.0.0",
  "main": "./src/app.js",
  "license": "MIT",
  "scripts": {
    "start": "nodemon ./src/app.js"
  },
  "type": "module",
  "dependencies": {
    "express": "^4.18.1",
    "nodemon": "^2.0.19",
    "redis-om": "^0.3.6"
  },
  "devDependencies": {
    "nodemon": "^2.0.19"
  }
}
Go to your terminal or CMD, CD (change directory) into your project and run yarn start or npm start.
The Next step is to define the Entity, Schema and Repository.
An Entity is a class for wrapping the objects that will be stored in the database. The Book Entity will extend to Redis OM Entity which will hold your data.
Schema is what we use to describe how the data will look. It defines the field and its types on the entity.
Repository is the interface that gives you access to create, read, update and delete methods that you can use to manipulate your records from the Entity class.
Inside the src folder create a BookEntity.js file that contains your Book Entity and Repository.
import { Entity, Schema } from 'redis-om';
import DBConnection  from './connection.js'

export class Book extends Entity {}

const BookSchema = new Schema(Book, {
    title: { type: 'string' },
    author: { type: 'string' },
    pages: { type: 'number' },
    publisher: { type: 'string' },
    publishedDate: { type: 'date' },
},{
    dataStructure: 'JSON'
});

export const BookRepository = DBConnection.fetchRepository(BookSchema)
await BookRepository.createIndex()
Let’s create our Controller and Routes file. Inside the src folder create a BookController.js file. This file will be a class that will contain your CRUD methods.
import { BookRepository } from './BookEntity.js';

export default class BookController {

    // store book
    static store = async (req, res, next) => {
        try {
            const book = await BookRepository.createAndSave(req.body);

            return res.send({
                status: "successful",
                data: book
            }, 201)
        } catch (error) {
            return next(error)
        }
    }

    // fetch specified book
    static getBook = async (req, res, next) => {
        try {
            const book = await BookRepository.fetch(req.params.id)
            return res.send({
                status: "successful",
                data: book
            })
        }catch (error) {
            return next(error)
        }
    }

    // update book
    static update = async (req, res, next) => {
        try {
            const book = await BookRepository.fetch(req.params.id);
            book.title = req.body.title;
            book.author = req.body.author;
            book.pages = req.body.pages;
            book.publisher = req.body.publisher;
            book.publishedDate = req.body.publishedDate;
            await BookRepository.save(book);

            return res.send({
                status: "successful",
                data: book
            })
        } catch (error) {
            return next(error)
        }
    }

    // delete book
    static delete = async (req, res, next) => {
        try {
            const id = req.params.id
            const result = await BookRepository.remove(id);

            return res.send({
                status: "successful",
            }, 200)
        } catch (error) {
            return next(error)
        }
    }
}
Let’s set up our router with the necessary endpoints. Inside the src folder create a routes.js file. Remember your route file has been imported on the app.js file and it is binding to your Express app.
import express from 'express';
import BookController from './BookController.js';
import BookSearchController from './BookSearchController.js';

const router = express.Router();

router.post('/create', BookController.store)
router.get('/:id/book', BookController.getBook)
router.post('/:id/book', BookController.update)
router.delete('/:id/book', BookController.delete)

export default router;
Go to your terminal on the root folder of your project and enter this command yarn start or npm start to start your app. Open your Postman (or whatever tool you use to test or consume RESTful APIs) and test your endpoint.
RediSearch
Is time to carry out some searches on your Book records including a full-text search. The Search class contains five methods.
import { BookRepository } from './BookEntity.js';

export default class BookSearchController {
    // find all book records
    static findAll = async (req, res) => {
        const result = await BookRepository.search().return.all()
        return res.json(result)
    }

    // find all albums where the artist is 'Charles Dickens'
    static findByAuthor = async (req, res) => {
        const result = await BookRepository.search().where('author').equals('Charles Dickens').return.all()
        return res.json(result);
    }

    // find all books where publishedDate year is equal to 2022
    static findByYear = async (req, res) => {
        const result = await BookRepository.search().where('publishedDate').eq(2022).return.all()
        return res.json(result)
    }

    // find first record
    static findFirstRecord = async (req, res) => {
        const result  = await BookRepository.search().return.first()
        return res.json(result)
    }

    // count all book records
    static countAll = async (req, res) => {
        const result = await BookRepository.search().return.count()
        return res.json(result)
    }
}
Go to your routes.js file and bind your search methods to your Express router.
import express, { Router } from 'express';
import BookController from './BookController.js';
import BookSearchController from './BookSearchController.js';

const router = express.Router();

router.post('/create', BookController.store)
router.get('/:id/book', BookController.getBook)
router.post('/:id/book', BookController.update)
router.delete('/:id/book', BookController.delete)

// search routes
router.get('/search/count', BookSearchController.countAll)
router.get('/search/all', BookSearchController.findAll)
router.get('/search/:author', BookSearchController.findByAuthor)
router.get('/search/:year', BookSearchController.findByYear)
router.get('/search', BookSearchController.findFirstRecord)


export default router;
Your file structure should look like the one below if you followed my tutorial.
📦redis-book-libray
 ┣ 📂node_modules
 ┣ 📂src
 ┃ ┣ 📜BookController.js
 ┃ ┣ 📜BookEntity.js
 ┃ ┣ 📜BookSearchController.js
 ┃ ┣ 📜app.js
 ┃ ┣ 📜connection.js
 ┃ ┗ 📜routes.js
 ┣ 📜package.json
 ┗ 📜yarn.lock
Conclusion
You have learned how to use the Redis OM, NodeJs and Express framework to develop RESTful APIs. You can go ahead and create more Entities (E.g Publisher) to get acquainted with the Redis technologies. GitHub repository to the project.
This post is in collaboration with Redis
Related
Redis Developer Hub – tools, guides, and tutorials about Redis
Watch this video on the benefits of Redis Cloud over other Redis providers
Also check out — Redis Installation